Step 7 - Wall facing and furring strips
[2/20/2005]
Wall facing installation continues with the front-right corner of the shop. This will likely be the last section I do for a little while, but later I plan to add to it and do the smaller areas around the doors and support beams.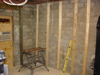
[2/13/2005]
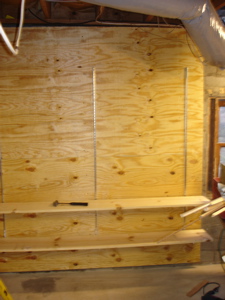
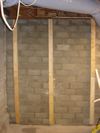
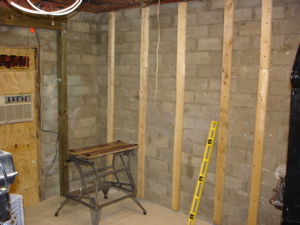
Facing continues down the same wall (as below) and around the only window in the shop. (Fig. 1) I'm using a laser level I got for Christmas (04), which I'm finding to be extremely handy. I happened to have a camera tripod and the level fits it perfectly. I use it to guide the installation of the furring strips, although I'm not too concerned about even spacing between strips.
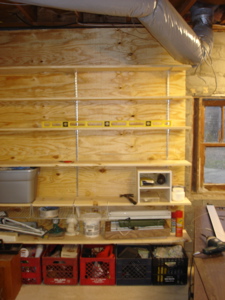
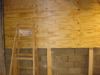
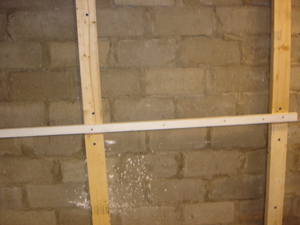
In Fig. 2, you can see the temporary 'deadman' installed horizontally. This is simply a scrap 1x2 board screwed temporarily to the strips to aid in hanging the large 3/4" plywood facing. I can't tell you how helpful this kind of thing is and I must highly recommend such tips to others who do solo work like I do. [In fact, I've seen an entire book recently at Lowe's dedicated to the subject of solo building. I might have to pick that up sometime.]
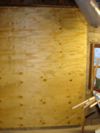
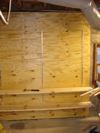
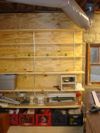
In Fig. 3, the plywood goes up and in 4/5, you can see I've extended the facing around the window. I've left 3 inches or so outside the edge of the window to allow for future finishing. I hope to add some trim and maybe a new, larger window to allow more natural light to come in.
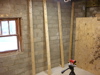
Fig. 1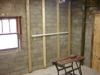
Fig. 2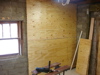
Fig. 3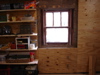
Fig. 4
Fig. 5
One obstacle in this project has been the surface of my mortar-and-cinder-block walls. Because the walls have settled and separated a bit from the house since this part of the house was added on, the walls aren't square or smooth. However, the new plywood facing is providing more consistency than was possible with the bare blocks.
[1/30/2005]
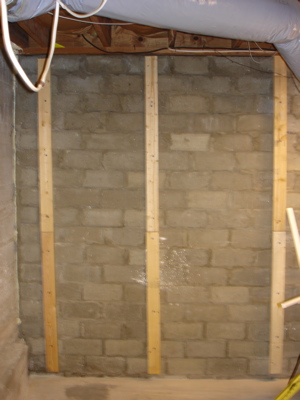
Here, the new facing installation begins. I researched this extensively and came to the conclusion that using what's called 'furring strips' would provide me with the best long-term flexibility for the walls of my shop. Furring strips can really be anything you like, including 1x2" construction-grade lumber. I chose plain old 2x4s for two reasons:
In the first few pictures below, you can see the strips attached to the first section of the outside wall. This is the back-right corner of the shop.

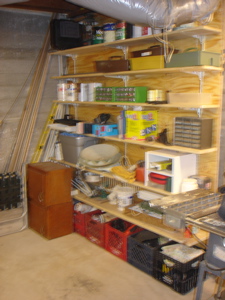
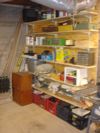
At this point, the plywood is installed and I've hung some adjustable shelf brackets and pine planks. Although I'll be reorganizing this stuff soon, it helps greatly in getting some of it off the floor and out of the way as the remodel continues. What I like about the brackets is that I could remove the bottom 3 or so and slide in a work table later on, if it suits me. Although, I'm looking seriously at employing a French cleat system throughout the rest of the shop. Much cheaper and about as good as these brackets. (In the last picture, my 7 year old daughter, Erin, flashes her thumbs up in approval of dad's latest project. She's my shop buddy.)

Wall facing installation continues with the front-right corner of the shop. This will likely be the last section I do for a little while, but later I plan to add to it and do the smaller areas around the doors and support beams.
[2/13/2005]
Facing continues down the same wall (as below) and around the only window in the shop. (Fig. 1) I'm using a laser level I got for Christmas (04), which I'm finding to be extremely handy. I happened to have a camera tripod and the level fits it perfectly. I use it to guide the installation of the furring strips, although I'm not too concerned about even spacing between strips.
In Fig. 2, you can see the temporary 'deadman' installed horizontally. This is simply a scrap 1x2 board screwed temporarily to the strips to aid in hanging the large 3/4" plywood facing. I can't tell you how helpful this kind of thing is and I must highly recommend such tips to others who do solo work like I do. [In fact, I've seen an entire book recently at Lowe's dedicated to the subject of solo building. I might have to pick that up sometime.]
In Fig. 3, the plywood goes up and in 4/5, you can see I've extended the facing around the window. I've left 3 inches or so outside the edge of the window to allow for future finishing. I hope to add some trim and maybe a new, larger window to allow more natural light to come in.
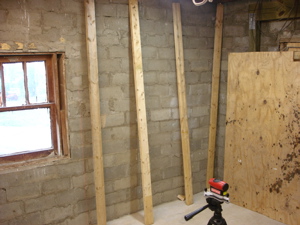
Fig. 1
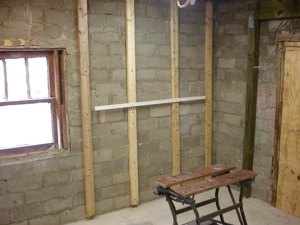
Fig. 2

Fig. 3
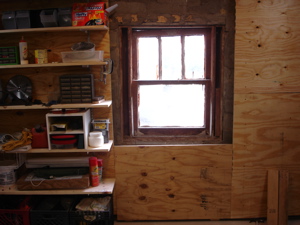
Fig. 4
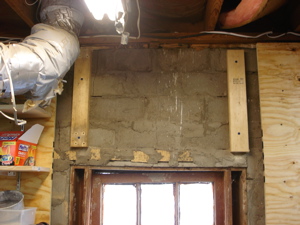
Fig. 5
One obstacle in this project has been the surface of my mortar-and-cinder-block walls. Because the walls have settled and separated a bit from the house since this part of the house was added on, the walls aren't square or smooth. However, the new plywood facing is providing more consistency than was possible with the bare blocks.
[1/30/2005]
Here, the new facing installation begins. I researched this extensively and came to the conclusion that using what's called 'furring strips' would provide me with the best long-term flexibility for the walls of my shop. Furring strips can really be anything you like, including 1x2" construction-grade lumber. I chose plain old 2x4s for two reasons:
- I already had them on-hand. In fact, I used some scraps since the 3/4" plywood facing will go over this and you won't ever see the strips underneath. I'm always trying to spend as little as possible without necessarily sacrificing utility in what I want to achieve in my shop. Some of the furring strips will be one board, some will be 2 partials laid end-to-end.
- The beefier strips will provide better holding to the screws I'll use to attach the plywood facing. I'll likely be attaching and re-attaching lots of fixtures to these walls over time, so durability and strength is paramount.
- .22 caliber concrete fasteners and a rented driver
- Masonry bit, rebar binding wire and galvanized nails
- Tapcon masonry screws and a hammer drill
In the first few pictures below, you can see the strips attached to the first section of the outside wall. This is the back-right corner of the shop.


At this point, the plywood is installed and I've hung some adjustable shelf brackets and pine planks. Although I'll be reorganizing this stuff soon, it helps greatly in getting some of it off the floor and out of the way as the remodel continues. What I like about the brackets is that I could remove the bottom 3 or so and slide in a work table later on, if it suits me. Although, I'm looking seriously at employing a French cleat system throughout the rest of the shop. Much cheaper and about as good as these brackets. (In the last picture, my 7 year old daughter, Erin, flashes her thumbs up in approval of dad's latest project. She's my shop buddy.)